Congratulations! You are the proud new owners of a KandL Design original creation, the ReadyToWake clock. We hope you and your kids really enjoy it!
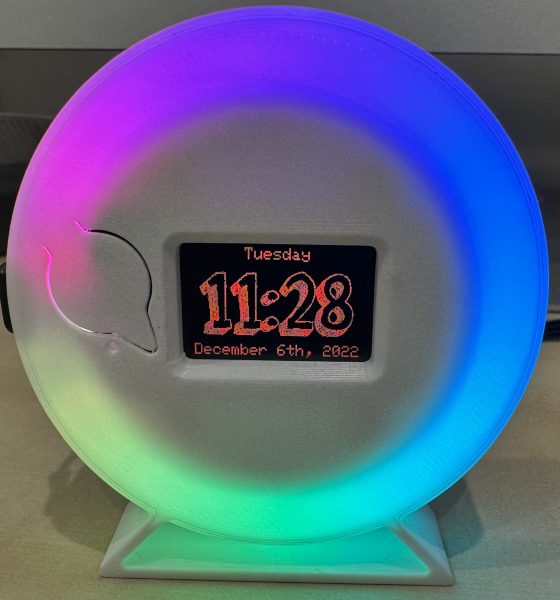
Let’s get started setting it up, and then we will show you some of the fun things it can do.
First, when you first plug it in, it will prompt you on the screen to connect it to your Wi-Fi.
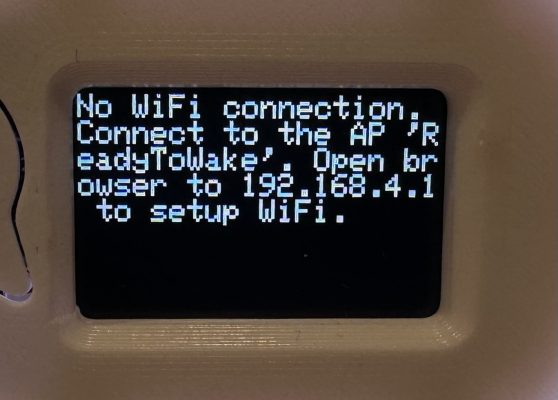
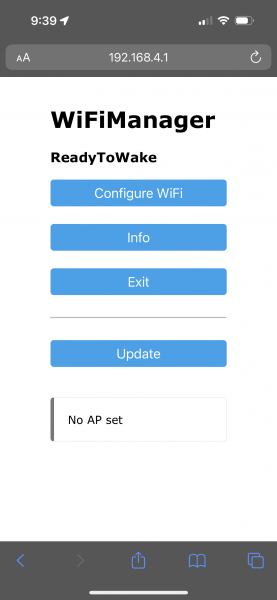
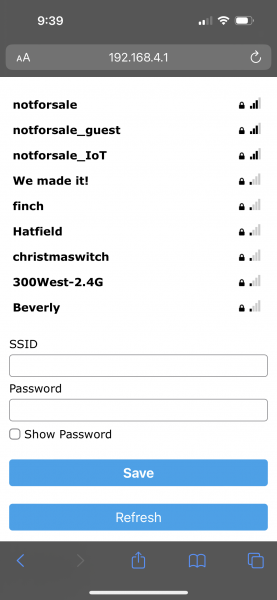
From your phone or a computer, join the access point it creates called “ReadyToWake” then, if the page hasn’t already popped up, go to a browser and type in 192.168.4.1. Click on Configure WiFi. Then click on your WiFi network and enter your password. Finally, click Save.
The clock will restart, and then during the process of booting, you’ll see a screen like this:
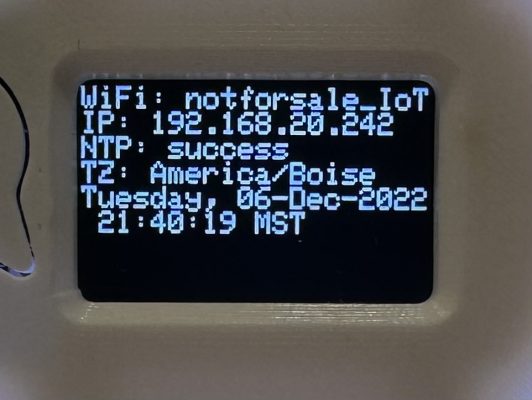
Note the IP address on the screen, you’ll need to remember that so you can connect to the clock’s webpage. If you missed it, don’t worry, just press and hold the button for a few seconds and a little help page will pop up. From this help page, you can see the IP address again, along with some other helpful quick information.
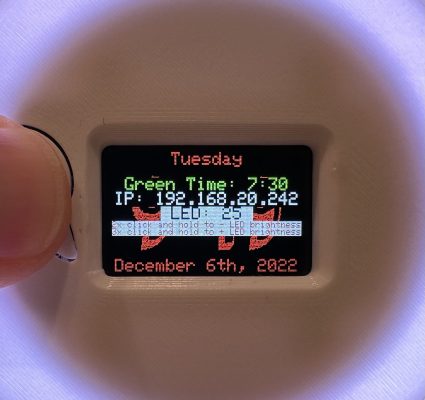
Now, go back to your browser and enter in the IP address of the clock. In my case, it’s 192.168.20.242. Alternatively, starting with v1.4, you can access it via http://readytowake.local. Once you enter that in, you will see a page that looks like this:
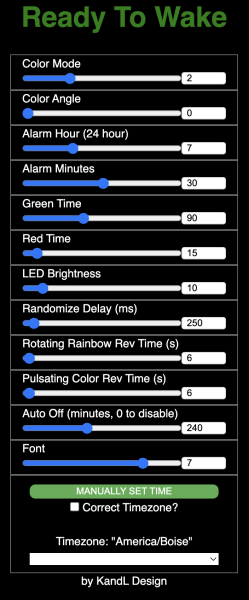
This is the main control page for the clock where you can configure everything as you’d like. Here is what each setting does.
| Option | Description | Notes |
| Color Mode | Changes the effect of LED light ring. | 0: night light 1: candy pops 2: rainbow 3: rotating rainbow 4: pulsating colors 5: hold color 6: spinning peppermint 7: off |
| Color Angle | Variable used internally to perform animations and draw the color wheel. | Mode 2: manually set the rainbow color position Mode 5: pick any color around the color wheel |
| Alarm Hour (24 hour) | The hour when the clock turns green, signaling it’s ready to wake time. | Input in 24 hour time format. Set to 7 for 7:30 am. |
| Alarm Minutes | The minutes when the clock turns green. | Set to 30 for 7:30 am. |
| Green Time | How long the clock should stay green before turning off the LED light ring. | Default 90 minutes. |
| Red Time | How long before the alarm time should the clock turn red and start the yellow countdown to green. | Default 60 minutes. As time progresses, the LED light ring will gradually turn more yellow to give an indication of how much longer it is until the clock turns green. |
| LED Brightness | Changes the brightness of the LED light ring. | Range from 0 – 100. |
| Randomize Delay (ms) | How long between updates when in Mode 1. | Given in milliseconds. |
| Rotating Rainbow Rev Time (s) | How long to complete a 360 degree rotation around the color wheel when in Mode 3. | Given in seconds. |
| Pulsating Color Rev Time (s) | How long to complete a 360 degree rotation around the color wheel when in Mode 4. | Given in seconds. |
| Auto Off (minutes) | How long after inactivity until the LED light ring turns off. Set to 0 to disable the auto off timer. | Given in minutes. |
| Font | Used to pick the clock face font. | |
| MANUALLY SET TIME | Used to manually set the time on the clock in the event it has no connection to the internet. | Sends the current time from the browser in UTC time. If the clock has not had any access to the internet, this will display UTC time on the clock. If it has had connection to the internet in the past, it will correct for the local timezone. Manually setting the time disables the NTP time synchronization, so the clock time will eventually drift and need to be reset. |
| Correct Timezone? | Used to correct the timezone in the event the clock came up without any access to the internet. | Set the checkbox and click the MANUALLY SET TIME button again in the event the time is displaying in UTC time. |
| Timezone | Used to set the local timezone. | Setting the timezone re enables the NTP time service. If there is no connection to the internet, the clock may reboot to try connecting to Wi-Fi again. |
The clock has one button with several possible actions. Here is how you can control it without the webpage.
| Sequence | Action | Notes |
| Single Click | Increase Color Mode | |
| Double Click | Decrease Color Mode | |
| Click and medium hold | Decrease Color Mode | Hold between 0.75 and 2 seconds |
| Long Press and release | Show Help Screen | Hold for longer than 2 seconds. Displays the Help Screen for as long as the button remains pressed. |
| Double Click and hold | Decrease LED Brightness | |
| Triple Click and hold | Increase LED Brightness | |
| 5x Click and hold | Erase network settings | If you need to make a change to the network connection, you can use this action to reset things and start over. |
Using a paperclip or like tool, you can also reset the network settings by pressing the reset button inside the small hole under the main button.
The help screen displays when the clock will go green, what the IP address is, what the current LED Brightness is, and reminders how to decrease and increase the LED brightness without needing to get your phone out.

If the clock cannot connect to the internet, it will create its own access point called ReadyToWake.
| State | Notes | Timing |
| Initial boot up if no known WiFi connections are available | Provides the WiFi Manager portal. Available at 192.168.4.1 after connecting to the ReadyToWake access point. | Available for 60 seconds. |
| After boot up if no WiFi connection is active | Provides the main control page for the clock. Available at 192.168.4.1. Requires reconnecting to the ReadyToWake access point. Useful to set the time on the clock without requiring an internet connection.
Once the clock creates the ReadyToWake access point used for the clock control, it will not attempt to reconnect to the internet without a reboot which can be triggered by unplugging the clock. |
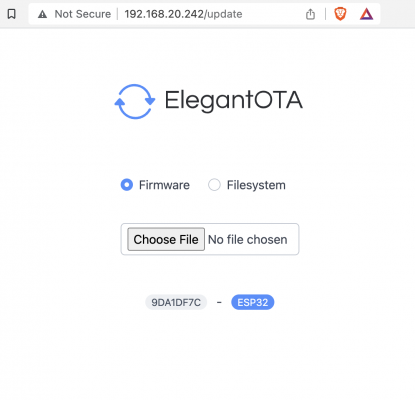
In the event that a software update becomes available, you will go to your IP address /update. So in my case, 192.168.20.242/update. There you will see the following page. Simply click Choose File and select the firmware file and click open. The clock will update and reboot automatically.
| Firmware Files: | ||
| V1.2 – Allow disable of the auto off timer |
ESP32-S2-v1.2 | ESP32-S3-v1.2 |
| V1.3 – Fix to make a disabled auto off timer setting persistent |
ESP32-S2-v1.3 | ESP32-S3-v1.3 |
| V1.4 – Improved network stability – Ability to reset network connections – Access via hostname readytowake.local |
ESP32-S2-v1.4 (use this one if not sure) |
ESP32-S3-v1.4 |
We really hope you enjoy your ReadyToWake clock! If you have any questions, please let us know.